
7.4 KiB
title, summary, sidebar, permalink
| title | summary | sidebar | permalink |
|---|---|---|---|
| Interface | Navigation allows the use of mouse and keyboard. You may also create shortcuts. Node's menu controls allows overiding the physics of the environment. | suite_sidebar | suite-designer-interface.html |
Navigation
Left-click on the black background and drag to move around the workspace.
You may also use the following key combinations on your keyboard:
- Ctrl or ⌘ + ← to pan to the left.
- Ctrl or ⌘ + → to pan to the right.
- Ctrl or ⌘ + ↑ to pan upwards.
- Ctrl or ⌘ + ↓ to pan downwards.
You may also use your keyboard as follows:
- Alt + ↑ to close the charts and open the designer.
- Alt + ↓ to close the designer and open the charts.
- Alt + → to open both the designer and the charts, assigning each one-half of the screen.
- Ctrl or ⌘ + Shift + ↑ to pull the separation bar up incrementally.
- Ctrl or ⌘ + Shift + ↓ to pull the separation bar down incrementally.
Node Shortcuts
You may define shortcuts for frequently-used nodes with the following procedure:
- Hover the mouse pointer over the target node until the menu opens up. This puts the node in focus.
- Click Ctrl or ⌘ + Alt + your preferred key to assign the shortcut.
- A sign will appear below the node confirming the assignation of the shortcut.
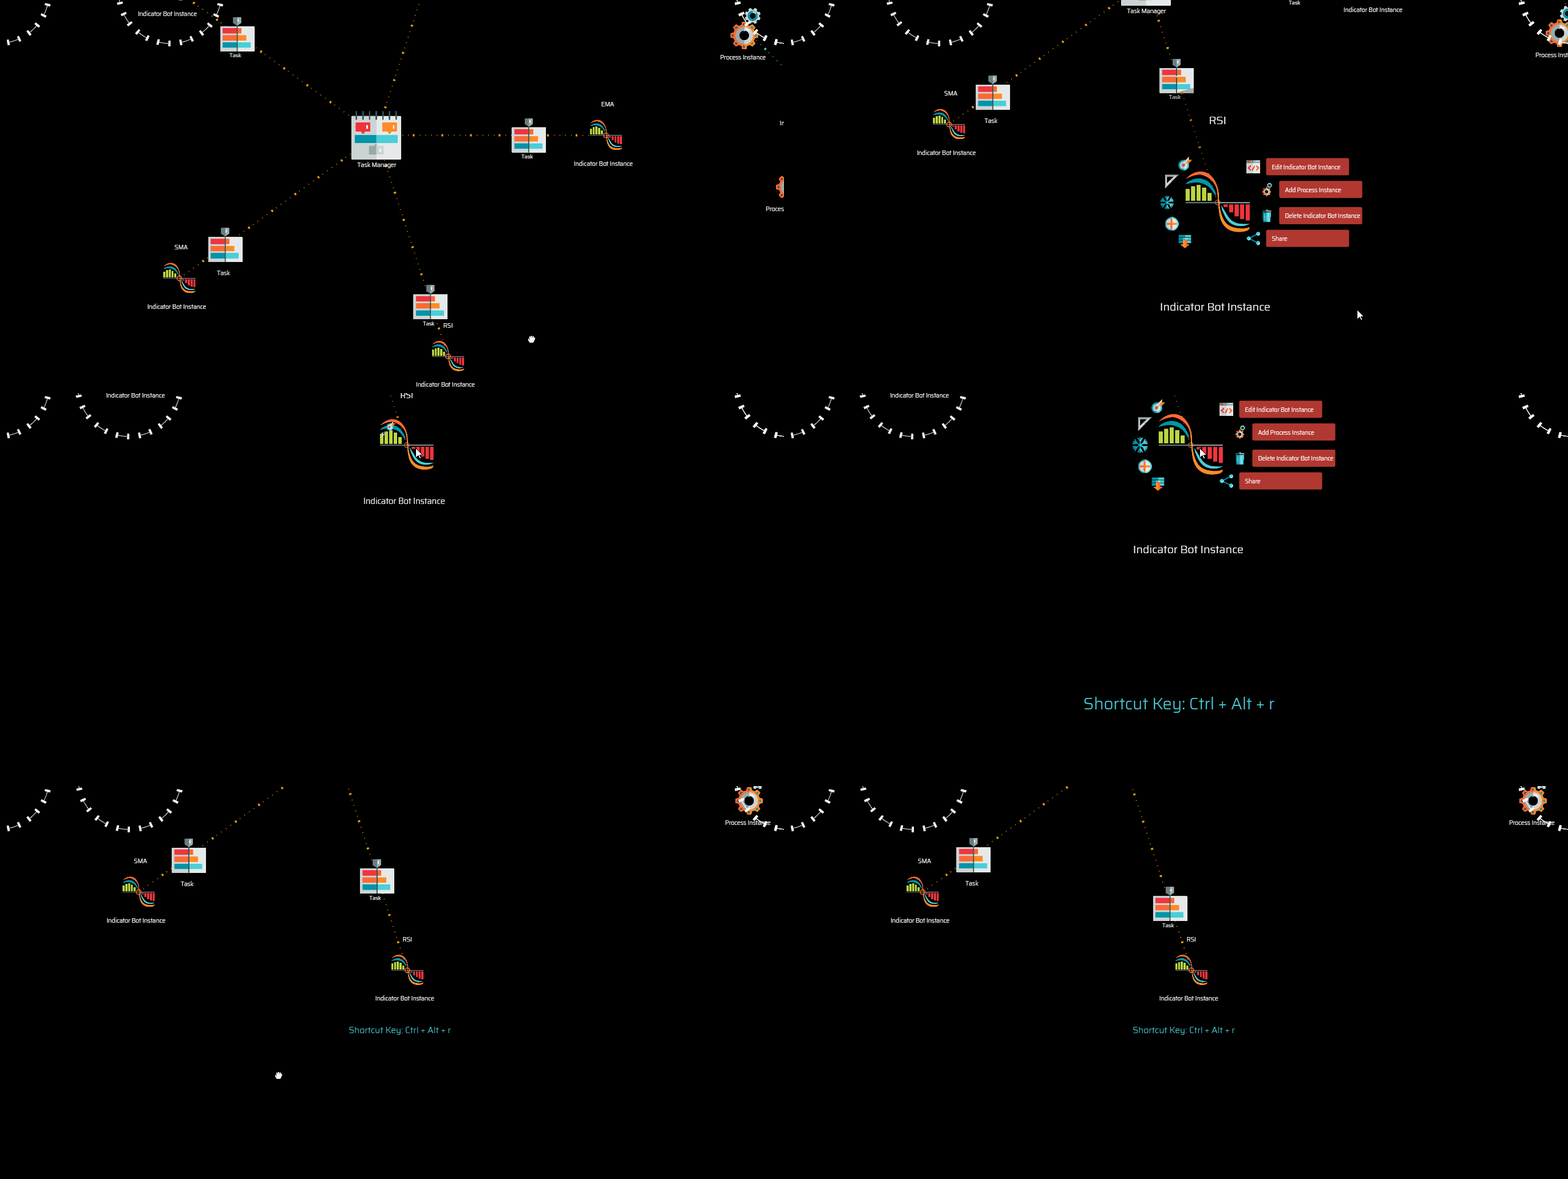
Repeat the same procedure to remove a shortcut.
When attempting to assign a shortcut with a keyboard combination that is already in use, the platform will notify of the issue. If you insist by hitting the same keyboard combination two more times, the platform will assign the shortcut as expected.
Node's Menu
Hovering the mouse pointer over nodes causes a menu to pop up. In this situation, the node is in focus.

The designer functions under the paradigm of a self-organizing workspace in which nodes tend to find their place guided by certain laws of physics, and constrained by their chain relationships.
This self-organizing paradigm saves users the effort of maintaining the arrangement of nodes in a logical manner, in particular when manipulating or creating new nodes.
However, there will be times in which you will want to override this self-organizing nature. The following menu options are tools that will help you manipulate the arrangement of nodes, overriding the physics that affect their default floating nature.
| Icon | Status / Action |
|---|---|
 |
The node is pinned to the workspace on a specific X-Y coordinate. |
 |
The node is free to find its place, unpinned. |
 |
The node's chain connections with its parent and offspring are frozen. Connecting lines are blue. If you freeze the head node of a hierarchy, then the whole hierarchy is frozen. Freezing node structures releases CPU resources, as the platform stops calculating node's positions and status. |
 |
The node's connections are unfrozen. If you click the option to unfreeze a node and the node does not change its status, that is because a higher node in the hierarchy is still frozen. |
 |
The node is locked to a rotational symmetry in relation with the rest of the nodes at the same level of the hierarchy, thus all angles between nodes are equal. The connection lines are orange. |
 |
The node is not locked in a rotational symmetry; instead, angles are free. The connection lines are yellow. |
 |
Clicking the minus button contracts the structure hiding offspring nodes. This also has the effect of releasing CPU resources as the platform stops calculating their position and status. In general, it is good practice to keep hierarchies closed when not being actively worked on. |
 |
Clicking the plus button expands the structure of offspring nodes. |
The rest of the menu options available in most nodes are the following:
| Icon | Action |
|---|---|
 |
Backup: Downloads a JSON file with the data structure and references concerning the particular node and the structure of offspring nodes in the hierarchy. Use this feature to save your entire workspace or any particular structure of nodes within your workspace so that you may later restore the information, including all references, should you need to. For your reference, the file downloaded is named Backup followed by the name of the node you are backing up. |
 |
Clone: Downloads a JSON file containing information similar to a backup. The main difference is that the feature is built to facilitate the production of identical copies of any particular structure of nodes of a hierarchy, or a complete hierarchy. Use this feature to accelerate your work process when you need to replicate nodes, for example, to create multiple testing sessions. The file downloaded is named Clone followed by the name of the node you are cloning. |
 |
Share: Downloads a JSON file containing information similar to a backup. The only difference is that no personal information is included. This is particularly important so that you do not share sensitive information accidentally, such as your API keys. Always use this function when you intend to share work. Do not share your backups. The file downloaded is named Share followed by the name of the node you are sharing. |
 |
Delete: Deletes the node and all its offspring. A confirmation in the form of an additional click is required. |